Amazon.com Widgets

nikondigital.org
Digital info for serious shooters: specializing in Nikon & Canon

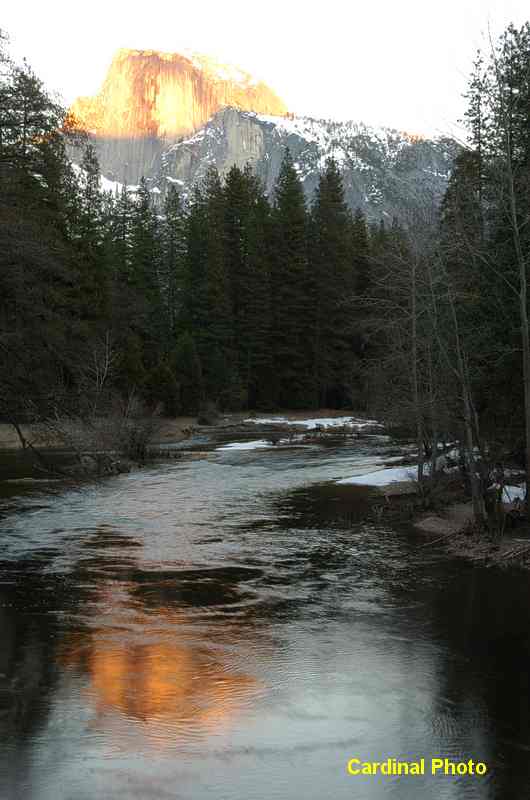
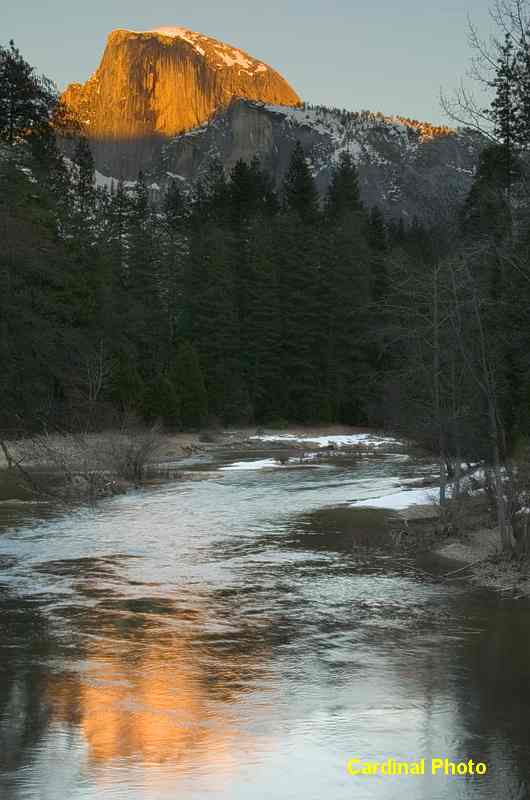
Landscape Photography, It's all about contrast

I was fortunate to be the guest shooter at this week's Digital Landscape Workshop in Yosemite. The theme for the week wound up being contrast. Both the use of contrast in landscape images and the contrasting shooting styles of co-hosts Moose Peterson and Vincent Versace were showcased. Proper understanding and use of contrast--perhaps more familiar as tone or gamma, but in any case the relationship between light and dark in an image--is essential for mastering landscape photography. We'll spend some time in this issue of DigitalPro Shooter (DPS) helping you understand how it can work for and against you, as well as how you can learn to master it. We'll also provide some key practical information I've gleaned from extensive shooting with the D2H and a couple days with the D70.

Digital Landscape Workshop--Yosemite

a First, if you've never been to a Digital Landscape Workshop (DLWS) and have any interest in landscape photography, you should go. You get to hang out in great locations with some of the world's greatest photographers and better yet they spend all their waking hours helping you learn to shoot! I've been the guest shooter at DLWS in both Moab and Yosemite, and have really enjoyed meeting and teaching the wide variety of eager students. This month we had the good fortune to have full waterfalls and gorgeous rainbows coupled with some nice shady moments in the forest to capture the babbling brooks of Yosemite Valley.
The bright sunlight streaming over the valley walls made an understanding of contrast--and how it inter-relates to the dynamic range of your camera--essential to getting good photographs. Basically, sunlight and shade mixed in an image creates far more contrast than can be captured by a single digital image. In technical terms, the dynamic range of the scene exceeds the dynamic range of the camera. This is far more difficult to teach than it seems. Because our eyes can incorporate large dynamic ranges we see many light and dark scenes as being perfectly exposed. But our cameras don't. Limited by the sensitivity range of their sensors, their meters must choose between keeping the highlights and relegating the shadows to a boring blackness, or showing us the forest detail in the shadows while turning the sunlit water into an eye-burning sea of bright white highlights.

How do you know if your camera will fail at capturing the range of light in the scene? If you are using a D-SLR the very simplest way is to use the Highlights, often called "blinkies", in the LCD on the rear of the camera. If portions of the image blink in highlight mode then they will be captured as pure, blazing white and not provide your image with any information. If you don't have highlights on your camera you can spot meter off the bright and dark areas of the scene. If the difference is more than 3 or 4 stops then you are unlikely to be able to record all the detail in both the light and dark areas. A D-SLR can record a dynamic range of up to 9 stops of light (each stop of light is a factor of 2, so 9 stops is a contrast ratio of 512:1 from brightest to darkest), but only the "middle" few stops of that range really contain enough detail to produce a high quality final image.


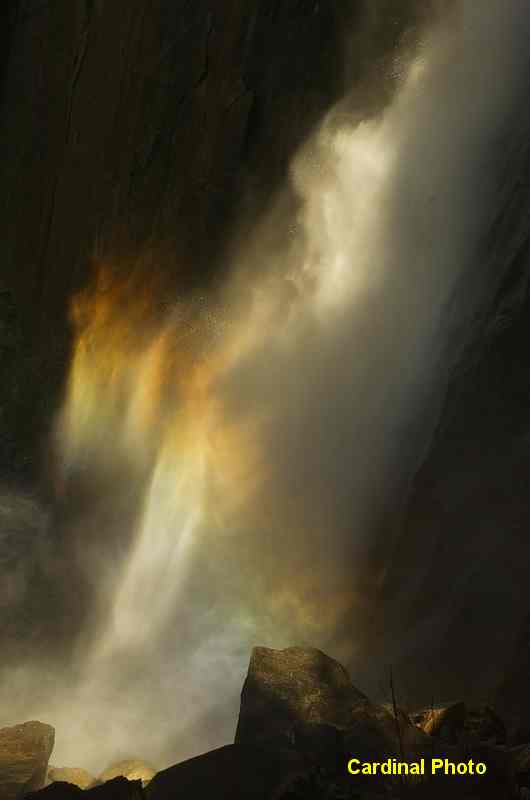
With film there are three traditional solutions to this problem: a split neutral density filter, overcast conditions, or early morning or late evening light. The high valley walls of Yosemite make getting early or late light on many of the falls impossible at most times of year. And we had almost no clouds while we were there. With film this would have left us with the option of using ND filters. While they are a great tool and one I employed liberally during the class especially for sunrise and sunset shots, they don't give you an easy way to protect highlights in the middle of the frame such as the water rushing down a waterfall.

Instead we needed to rely on digital to help us. The first big trick that digital provides is the ability to capture multiple images and blend them together into a single image. Unlike multiple exposures with film you have complete control of how the blending occurs. Creating one exposure metered for the highlights and another metered for the rest of the image is one simple way to gather the raw material to create a single "high dynamic range" scene by blending the two images in Photoshop. I first used this technique with scanned slides at the Grand Canyon years before I was shooting digital, but digital capture makes it much faster and easier. One key of course is to try to get the images exactly in line, by shooting them on a very stable tripod with the camera locked in place. Below is an example of using this technique to assemble a single image of Half Dome captured at sunset reflecting in the Merced River.

b c d
Exposed for shadows
Exposed for highlights
Blended image

If you'd like more information on this technique, I highly recommend Photoshop CS Artistry, which has an entire chapter devoted to using it for landscape photography.

Contrast in Styles

Light didn't provide the only contrast at DLWS. Moose and Vincent both create stunning images and prints but with vastly contrasting styles. Moose works to create his vision from a single image or perhaps two images blended for exposure, followed by some simple work in Nikon Capture or Photoshop to share his original vision, while Vincent is an innovator at what he calls "image harvesting." He takes portions of as many as 6 images and masterfully blends them together to recreate his artistic vision of the scene. Whichever style resonates with the attendees they are treated to detailed sessions in learning both styles as well as hands on advice on how to apply them to their own vision and images. They are then treated to free paper and use of numerous Epson 2200 printers where they can evaluate the results of their efforts. Most importantly, in extensive shooting sessions every morning and evening Vincent, Moose, Laurie Excell and the guest shooter help participants learn how to see the final image at the time they press the shutter release--including composition, exposure, color and most importantly the message they want to communicate. From beginning to end it is stressed that Photoshop is not a tool for fixing bad images but instead a tool for helping us realize our vision of a scene by recreating what we saw and the camera was unable to capture directly.


Subscribe to DigitalPro Shooter
Enter your email to receive our newsletter on shooting digital.

E-mail: 
ND Image
All contents copyright Pro Shooters LLC. All rights reserved.
Nikon is a trademark of Nikon Corporation.
nikondigital.org is not affiliated with Nikon Corporation.
nikondigital.org